Showing posts with label project_log. Show all posts

Thursday, 14 June 2018

Traitor Librarian project: the final

The Traitor-Librarian project is finally over and went yesterday to a new home. This project took considerably more time than I had originally planned and was one of those rare works that I would gladly leave in my collection. While working on this miniature, I came up with several interesting ideas that I will definitely try to realize when I make such an uncle for myself.
I hope you were also interested in watching the process and liked the result.

CMON voting link: http://www.coolminiornot.com/427318
Putty&Paint voting link: https://www.puttyandpaint.com/projects/17870

All list of project log
Traitor Librarian project, part 1: the begining
Traitor Librarian project, part 2: - the Base
Traitor Librarian project, part 3: NMM
Traitor Librarian part 4: Reds
Traitor Librarian part 5: Burn Fire Burn!

Monday, 11 June 2018

Traitor Librarian part 5: Burn Fire Burn!


The last part of the Traitor-Librarian project log will be devoted to the fire demon and glow effects.
The first thing that I would like to note is that the fire and all sorts of similar effects are better drawn on a light undercoat. Because I primed miniature with black, I need to do a layer of the light undercoat. I used Khaki (VGC), but in principle, any extra opaque light colors would work.

Thursday, 7 June 2018

Traitor Librarian part 4: Reds


Since I have repeatedly written about working with reds in previous projects, I'll just describe the used colors and techniques. On this model I used two variants of red, warm on a cloak and a tabard and a cold red-magenta on a book and a staff.

Wednesday, 23 May 2018

Traitor Librarian part 3: NMM


Since in the previous project the part with the HMM was fairly well disclosed, I will only allow myself to describe the changes in the recipes regarding the previous variants.

Saturday, 12 May 2018

Traitor Librarian project, part 2 - the Base

This part of the project log will cover painting the base. I was going to make it a bit darker than previous versions, so that the glow from the flame, which I will do later, looked more convincing. Since I have not yet decided what color this flame will be, then I will draw reflexes closer to the end of the project.

Tuesday, 8 May 2018

Traitor Librarian project, part 1


I started a new project log, dedicated to painting a miniature "Traitor Librarian in Cataphractii Terminator Armor" from ForgeWorld stitched by magnificent Tom Hugues. This model also needed to be painted in the colors of the Legion of Iron Warriors.

Saturday, 21 April 2018

Praetor-Tribune project log: the Final


I am very glad to introduce to you the final result of my Praetor-Tribune project. I got a lot of fun while painting this miniature and tried ti share to you all this project's experience.
Also this project inspired me not only to do more Iron Warriors characters but also do a some Emperor Children project too.


Previous Parts:

Tuesday, 17 April 2018

"Praetor-Tribune" project log, part 6: the lollipop sword

"Praetor-Tribune" project log, part 6: the lollipop sword

In the last part of the project, I will touch on one more important focal point of the our praetor miniature, which is the sword. I decided to do his blade is bright red and very contrast both in light and in color. This scheme is very similar to the one I used when painting crystals on the Demonsmith's base last year, but it has some changes.


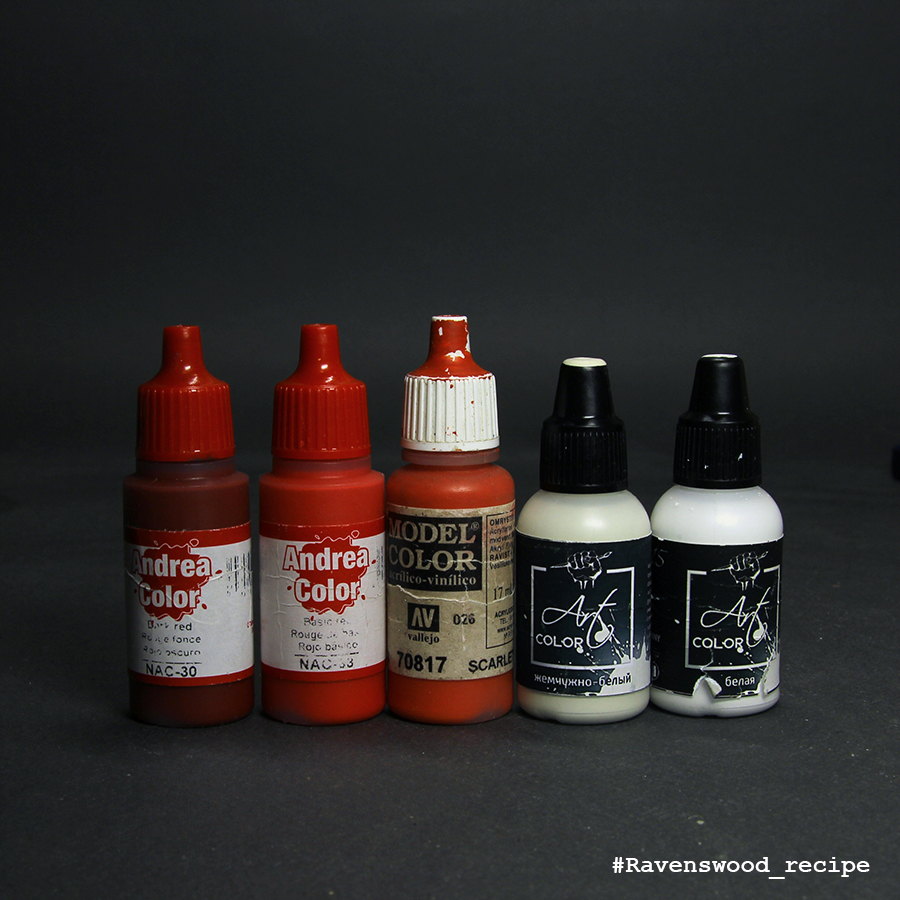
Firstly, I finally bought my favorite Basic Red from Andrea Color (and a few more of their colors), which I'm incredibly happy with. And secondly, the shape of the blade forced alternating two variants of red, to achieve greater contrast.

I note that from the point of view of the display light and color on the blade a certain number of errors are allowed. But they are made deliberately to increase the contrast between the surfaces. In addition, after a series of tests, it was decided to abandon the glowing stones on the blade and reduce the OSL effect a minimum (because of which it was half repainted one hand)


The Light. Here everything is standard, as for the previous parts. First I chose the place for the main highlight and made a shadows, midlights, additionals light and reflexes. The most important of which I proceeded - with fracture surface should be strong contrast. This visually emphasizes the shape and along with the color makes the blade of the sword a focal point.

 Colour. When working with the blade, in addition to the contrast of light and shadow, I decided to add a color contrast between the surfaces. The brightest part will be cold red (due to white), the second - a warm yellow-orange. You can notice that one of the surfaces is partially made in one grade, partly in another. In this case, I sacrificed "correctness" for the sake of greater contrast and dramatic effect.


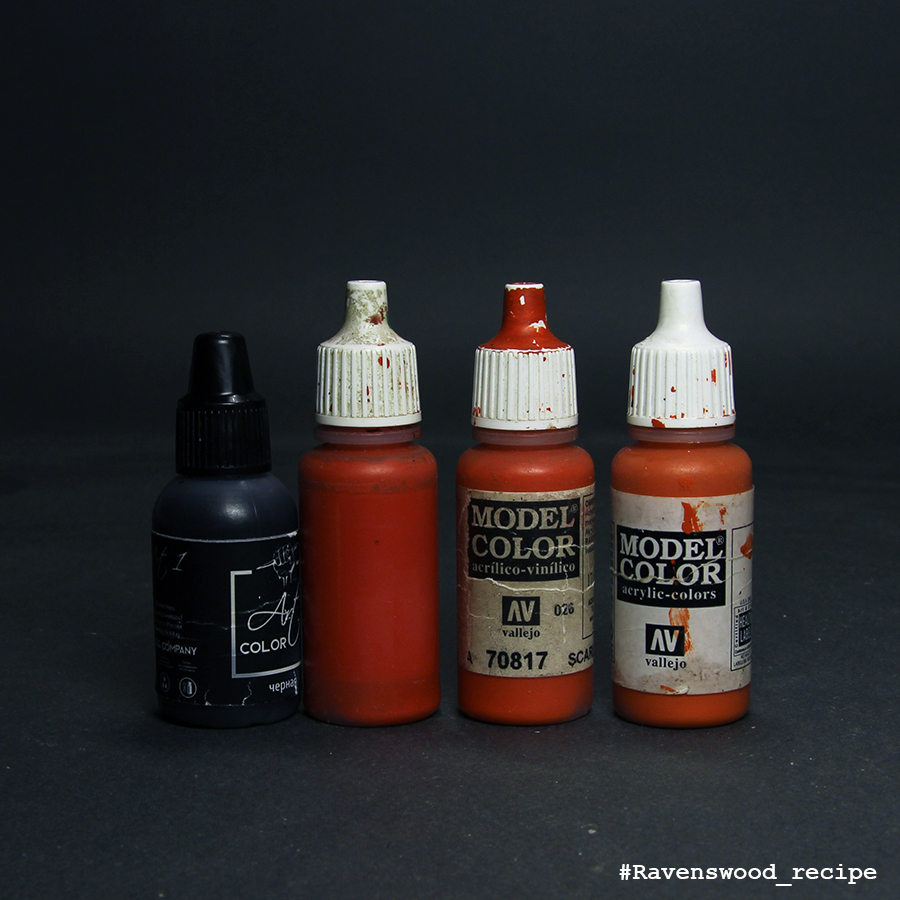
As the base color for the "cold" part, I used Dark Red (Andrea Color) sequentially flashed through pure Basic Red (AC) to Scarlet (VMC). For final highlights and highlights, I used a mixture of Scarlett and Pearl White (P88), which gradually added white. In addition, as far as highlighting, I periodically made Basic Red frosting to keep a cool red tint.
The base color for the warm part was a mixture of black and Dark Vermillion (VMC), which was consistently bleached from the beginning to the pure Dark Vermillion, and then to Scarlet. The final highlightings were made by a mixture of Scarlet and Amarantha Red (both VMCs).
Previous Parts:

Sunday, 8 April 2018

Praetor Tribune Project, part 5: bronze (eng)

Working with this miniature, I wanted to revise my painting experience of the previous Iron Warriors praetor. On that model, there were few surfaces that could be bronze made, so I'd have to make them very bright and contrast so that they stand out. There were much more such surfaces, because of what I decided that this bronze should be "more calm", both in color and in contrast.


Sunday, 1 April 2018

Praetor Tribune project: part 4 (eng)

n this part I will tell you a little about how the steel HMM was made. The basis for this I described in a short article for Figure Mentors Magazine (http://figurementors.com/step-step-guide-painting-nmm-beginners-sergey-gybin-aka-ravenswood), now it's possible to describe it a little more. Consider the color scheme in terms of two parameters: the lights and the colors.

Tuesday, 27 March 2018

Praetor Tribune project: part 3 (eng)

The third part of the project log is about painting the base. After several tests, which were written in the second part, I decided that the dead lagionnaire on the base should belong to the Emperor's Children Legion.


The main color of the armor was made with a mixture of Purple and Violet, with  highlinghts by Pearl White and shading by Indigo (all Pacific88 art-color).
 Gold was made by the standard scheme from Armor Brown, Scrofulous Brown and Golden Brown (all Vallejo Model air, game color and model color respectively). In the end, I added a lot of battle damage to the purple armor by almost pure Pearl White.


I also decided to add some blood, and then a little more. And further. As a result, I had to do some light glaze layers with the Violet and a mixture of SB / BG on top to unite visually the blood and armor.

Blood was drawn by dotting in three stages: pure Blood for the Blood god, a mixture of BFTHB with a black and some analogue of carmine red from Pacific88. As a result, the blood began to look more voluminous and shine less.


Well and besides I painted our praetor's head. Inside the armor, it looks much nicer, than separately.


Previous Parts:

Sunday, 18 March 2018

Praetor Tribune project: part2 (eng)

The second part of this project log will be devoted to the part of the work that I very rarely show: the color scheme tests. For this miniature, I've done a lot of tests to see which color combination works best for this project. Bigger part of time was spent on the tests of the color scheme for the dead legionary on the base. I tried six color schemes to display a different Legiones Astartes: the yellow and black schemes of the Imperial Fists, the turquoise for the Alpha Legion, the standard iron for the Iron Warriors, and the two color schemes for the Emperor's Children legion, purple and violet. Unfortunately I took photos of the part of this process. As a result of these tests, the stand will be washed, slightly reworked, and repainted in the color of the Emperor's Children


I also did some tests for new recipes for the HMM. I tried a new recipe for steel based on the Pacific88 art color paints, in my opinion quite successfully. I'm not sure that he will replace my current version, but I will definitely make some of the future miniatures in such a gamut. The recipe for cold yellow gold, I also decided to stay for future projects, but I use the "orange" bronze in this miniature.


Previous Parts:

Praetor Tribune project: part2 (rus)

Вторая часть дневников проектов будет посвещена той части работы которую я очень редко показываю, а именно подбору цветовой схемы. Для этой миниатюры я сделал множество тестов, чтобы конять какое сочетание цветов лучше подойдет для данного проекта.  Особенно много времени занял подбор цветовой схемы для мертвого легионера на подставке. Я попробовал шесть цветовых схем для отображения разныз легионов: желтая и черная схемы Имперских Кулаков, бирюзовдве схемы под легион Детех Императора, более фиолетовая и пурпурная. К сожалению я сделал фотографии долько части этого процесса. По итогам этих тестов, подставка будет отмыта, немного переделана, и перекрашена в цвете Детей Императора.

                            
Также я сделал несколько тестов новых рецептов для НММ. Я опробовал новыая для Альфа Легиона, стандартная для Железных Воинов, и й рецепт стали на основе красок Pacific88, на мой взгляд достаточно удачно. Не уверен, что он заменит мой нынешний вариант, но точно я сделаю часть будуших миниатюр в такой гамме. Рецепт холодного желтого золота я также решил остать для будуший проектов,  а вот «апельсиновую» бронзу я использую в данной миниатюре. 


Tuesday, 13 March 2018

Praetor Tribune project: part 1 (rus)

Предлагаю вашему вниманию новый проект на основе миниатюры Legion Praetor Tribune in Tartaros Terminator Armor от ForgeWorld. Для начала немного о самой миниатюре. Она несколько отличается от других миниатюр линейки Ересь Хоруса тем, что в основной массе в ней присутствуют рубленные линии и острые углы. В принципе, я без особых сложностей мог бы повторить подобную модель в CADе (кроме головыи черепов, разумеется). Однако в этих линиях есть свой неповторимый стиль, что выделяет её из линейнки. Что не может не радовать.


Поскольку эта миниатюра заказная, я несколько ограничен в выборе подставки и конверсий, кроме того лаконичность данной модели позволяет больше сосредоточиться на техническом аспетке покраски. Я не планирую делать никаких конверсий, кроме подставки.

О подставке. Я поместил на неё мертного легионера, собранного их резных деталей доствехов МК2 с небольшой долепкой. Изначально я хотел сделать ему череп вместо щлема и отдельно шлем на замле, но, к сожадению, не нашел подходящего  по размеру черепа. Кроме того, я использовал немного сосновой коры и пару черепов. В таком виде подставка может сойти как за Ургальскую низину, так и за пустоши Талларна.

Теперь, когда миниатюра готова к началу покраски, мне предстоит выбрать цветовую схему для всего проекта. Понятно что основой будет коричнево-голубой стальной НММ (как обычно), но остальные цвета ещё предстоит подобрать. Основная проблема - выбор цвета для силового клинка и легиона для мертвеца на подставке.

Praetor Tribune project: part 1 (eng)

I bring to your attention to my new project based on the miniature Legion Praetor Tribune in Tartaros Terminator Armor from ForgeWorld. But first a little about the miniature itself. It differs somewhat from other miniatures of the Horus Heresy in the main mass there are chopped lines and sharp corners. In principle, I could repeat such a model in CAD without any difficulties (except head and skulls ofcourcs). However, these lines have their own unique style, which distinguishes it from the HH range.

Since this miniature is commission, I'm a bit limited in choosing a base and conversion, in addition, the overall look of this model allows you to concentrate more on the paint technic than the anything else. I do not plan to make any conversions, except for the stand and maybe change the head.
About the base . I placed on it a dead legionnaire, converted from the parts of the defferent MK2 armor kits (old, new, rampagers etc.) with a little bit of sculpting work . Initially, I wanted to make him a skull instead of helmet and a separate helmet at the ground  but, unfortunately, I didn't find a suitable skull in size. In addition, I used a little pine bark and a couple of skulls. In this form, the stand can go both for the Urgalsky lowland and for the wasteland of Tallarn.
Now that the mini is ready for painting, I have to choose a color scheme for the whole project. It is clear that the basis is a brown-blue steel NMM (as usual), but the remaining colors have yet to be chosen. The main problem is the choice of colors for the power blade and the legion for the dead man on the base.